Container Registry with Amazon ECS on the AWS Cloud
Quick Start Reference Deployment

September 2020
Mark Bennett, Trace3
Yaniv Bossem and Dylan Owen, AWS Quick Start team
| Visit our GitHub repository for source files and to post feedback, report bugs, or submit feature ideas for this Quick Start. |
This Quick Start was created by JFrog, Ltd. in collaboration with Amazon Web Services (AWS). Quick Starts are automated reference deployments that use AWS CloudFormation templates to deploy key technologies on AWS, following AWS best practices.
Overview
JFrog’s Container Registry (JCR) is a comprehensive and advanced repository manager, supporting Docker containers and Helm Chart repositories for your Kubernetes deployments. This Quick Start deploys Container Registry in a highly scalable configuration in the Amazon Web Services (AWS) Cloud.
This Quick Start is for administrators who want the flexibility, scale, and availability of AWS through products, such as virtual private clouds (VPCs), Amazon Elastic Compute Cloud (Amazon EC2), Amazon Elastic Container Service (Amazon ECS), Amazon Simple Storage Service (Amazon S3), Elastic Load Balancing (ELB), and Amazon Relational Database Service (Amazon RDS), to deploy Container Registry as their repository manager.
Amazon EC2 and Amazon ECS, along with Amazon S3 and Amazon RDS, form this deployment’s foundation. It uses Amazon S3 and Amazon RDS for persistent storage of artifacts and configuration files, respectively. Container Registry can be entirely redeployed, or upgraded in place, depending on your requirements.
This Quick Start configures a single Amazon EC2 Auto Scaling group that configures Amazon EC2 nodes for an Amazon ECS cluster. The EC2 nodes are specifically configured for Container Registry, with configuration files mapped to the containers. Container Registry is configured as a single ECS service running a task definition, which in turn deploys an Container Registry and NGINX container in each service:
-
The service is configured as a Container Registry instance and has, at most, only one task running at a time.
The ECS tasks are monitored by a Network Load Balancer (NLB), which verifies that port 443 is listening. This health check is important because the NGINX container listens on port 443 and depends on Container Registry being in a healthy state. Should the endpoint fail to respond, the task is shut down, and a new task is deployed.
| Amazon may share user-deployment information with the AWS Partner that collaborated with AWS on the Quick Start. |
Container Registry with Amazon ECS on AWS
Once you deploy JFrog’s Container Registry, you can use it as a production service. For further information about setting up Container Registry, see the Getting started with Container Registry section, later in this guide.
| The deployment is configured as “infrastructure as code.” Any changes to the infrastructure should be done by updating the CloudFormation stack. Any changes performed on the boxes themselves (including reverse-proxy configurations) are lost when an instance reboots. By design, upon shutdown of an instance — or when Container Registry is unavailable — an Auto Scaling group replaces the node, following a load-balancing health check. |
Cost
You are responsible for the cost of the AWS services used while running this Quick Start. There is no additional cost for using the Quick Start.
The AWS CloudFormation templates for Quick Starts include configuration parameters that you can customize. Some of the settings, such as the instance type, affect the cost of deployment. For cost estimates, see the pricing pages for each AWS service you use. Prices are subject to change.
| After you deploy the Quick Start, create AWS Cost and Usage Reports to deliver billing metrics to an Amazon Simple Storage Service (Amazon S3) bucket in your account. These reports provide cost estimates based on usage throughout each month and aggregate the data at the end of the month. For more information, see What are AWS Cost and Usage Reports? |
Software licenses
This Quick Start does not require you to purchase any license as JFrog Container Registry is a free product.
Architecture
Deploying this Quick Start for a new Virtual Private Cloud (VPC) with default parameters builds the following Container Registry environment in the AWS Cloud.

As shown in Figure 1, the Quick Start sets up the following:
-
A highly resilient architecture that spans two Availability Zones.*
-
A VPC configured with public and private subnets, according to AWS best practices, to provide you with your own virtual network on AWS.*
-
A Network Load Balancer attached to the public subnets connecting via port 443 to the NGINX container, providing reverse-proxy and SSL termination for the Container Registry node listening on port 8081.
-
A private and encrypted S3 bucket for repository storage.
In the public subnets:
-
Managed NAT gateways to allow outbound internet access for resources in the private subnets.*
-
A Linux bastion host in an Auto Scaling group to allow inbound Secure Shell (SSH) access to EC2 instances in public and private subnets.*
In the private subnets:
-
An Amazon RDS instance accessible only from the private subnets on port 5532.
-
One Amazon ECS service group for the Container Registry deployment.
-
Container Registry and NGINX containers.
-
An Auto Scaling group configured specifically for Container Registry.
*The template that deploys the Quick Start into an existing VPC skips the components marked by asterisks and prompts you for your existing VPC configuration.
Amazon ECS services
There is a single Auto Scaling group for the Container Registry hosts. The service comprises containers that are deployed to the hosts via bridge networking. Upon a Container Registry service or overall container failure, the ECS service automatically recreates the Docker instances. For this reason, all configurations are done on boot and result in a loss of any data that are not stored in the Amazon RDS instance or S3 bucket. This includes the NGINX container that is tied to the Container Registry instance.
Ansible init script
The Amazon EC2 Docker hosts that support the ECS cluster are configured via Ansible and
follow Docker Compose best practices for Container Registry. Ansible is installed and configured to
run only on the initial boot. For Container Registry 7, a new system.yaml file is required for
configuration. This file is generated using yq (a portable command-line YAML processor)
and environment variables. Ansible and the startup script, in cooperation with the Auto
Scaling group, generates Container Registry’s required configuration files. These generated files are
then mapped and mounted into containers.
|
Do not change the stack’s master key when you update the stack. This
will result in future nodes being unable to join the cluster and an unsupported
configuration. To update a Secure Sockets Layer (SSL) certificate, you will need to update the CloudFormation stack by changing the certificate and certificate key inputs, and redeploying the nodes (see the Updating Container Registry). If you change the certificate and certificate key manually on the EC2 instances, instead of updating the CloudFormation stack, the manual changes will be lost during the next upgrade or reboot, resulting in an unwanted configuration. |
Planning the deployment
Specialized knowledge
This deployment requires a moderate level of familiarity with AWS services. If you’re new to AWS, visit Getting Started with AWS and Training and Certification. These sites provide materials for learning how to design, deploy, and operate your infrastructure and applications on the AWS Cloud.
This Quick Start assumes familiarity with JFrog Container Registry and infrastructure as code.
AWS account
If you don’t already have an AWS account, create one at https://aws.amazon.com by following the on-screen instructions. Part of the sign-up process involves receiving a phone call and entering a PIN using the phone keypad.
Your AWS account is automatically signed up for all AWS services. You are charged only for the services you use.
Technical requirements
Before you launch the Quick Start, your account must be configured as specified in the following table. Otherwise, deployment might fail.
Resource quotas
If necessary, request service quota increases for the following resources. You might request quota increases to avoid exceeding the default limits for any resources that are shared across multiple deployments. The Service Quotas console displays your usage and quotas for some aspects of some services. For more information, see What is Service Quotas? and AWS service quotas.
| Resource | This deployment uses |
|---|---|
VPCs |
1 |
Elastic IP addresses |
3 |
AWS Identity and Access Management (IAM) security groups |
1 |
IAM roles |
2 |
Security groups |
4 |
Auto Scaling groups |
2 |
Load Balancers |
1 |
m4.xlarge instances |
1 |
t2.micro instances |
1 |
db.m4.large (RDS) |
1 |
S3 Buckets |
1 |
ECS cluster |
1 |
ECS service |
2 |
Supported Regions
-
us-east-1 (N. Virginia)
-
us-east-2 (Ohio)
-
us-west-1 (N. California)
-
us-west-2 (Oregon)
-
ca-central-1 (Canada Central)
-
eu-central-1 (Frankfurt)
-
eu-west-1 (Ireland)
-
ap-southeast-1 (Singapore)
-
ap-southeast-2 (Sydney)
-
ap-northeast-1 (Tokyo)
-
ap-northeast-2 (Seoul)
-
sa-east-1 (South America)
| Certain Regions are available on an opt-in basis. See Managing AWS Regions. |
IAM permissions
Before launching the Quick Start, you must sign in to the AWS Management Console with IAM permissions for the resources that the templates deploy. The AdministratorAccess managed policy within IAM provides sufficient permissions, although your organization may choose to use a custom policy with more restrictions. For more information, see AWS managed policies for job functions.
Deployment options
This Quick Start provides two deployment options:
-
Deploy Container Registry with Amazon ECS into a new VPC (end-to-end deployment). This option builds a new AWS environment consisting of the VPC, subnets, NAT gateways, security groups, bastion hosts, ECS cluster, EC2 nodes to support the ECS cluster, an S3 bucket, and an Amazon RDS instance. It then deploys Container Registry as a service onto the ECS cluster into a new VPC.
-
Deploy Container Registry with Amazon ECS into an existing VPC. This option provisions Container Registry into your existing AWS infrastructure and creates an S3 bucket and Amazon RDS instance.
Optionally, an existing ECS cluster can be specified. New EC2 nodes, however, are created and configured to support running Container Registry tasks, as mentioned earlier in this guide.
The Quick Start provides separate templates for these options. It also lets you configure Classless Inter-Domain Routing (CIDR) blocks, instance types, and Container Registry with Amazon ECS settings, as discussed later in this guide.
Deployment steps
Sign in to your AWS account
-
Sign in to your AWS account at https://aws.amazon.com with an IAM user role that has the necessary permissions. For details, see Planning the deployment earlier in this guide.
-
Make sure that your AWS account is configured correctly, as discussed in the Technical requirements section.
Prepare the certificate and certificate key
Due to the underlying JSON system, the parameters for both the certificate and certificate key must be edited by replacing their line endings.
-
Copy the certificate into a text editor, and view line endings. Line endings on Windows and Linux terminate in CRFL and LF, respectively.
-
Remove all CRFL or LF characters, and replace them with the | (pipe) character. This puts the certificate on a single line.
-
Follow the same process for the certificate key.
Add the certificate to AWS Secrets Manager
-
Open AWS Secrets Manager in the same Region in which you deploy the Quick Start.
-
Choose Store a new secret.
-
Choose Other type of secret.
-
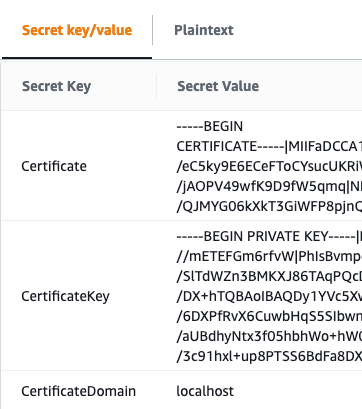
For the secret key value, create three rows for the certificate information.
-
Key names should be as follows, with the key values being the certificate details. (See Figure 2.)
-
Certificate -
CertificateKey -
CertificateDomain
-
-
Choose Next.
-
Provide a secret name. This name is used to deploy this Quick Start.
-
Choose Next twice.
-
Choose Store.
Launch the Quick Start
| You are responsible for the cost of the AWS services used while running this Quick Start reference deployment. There is no additional cost for using this Quick Start. For full details, see the pricing pages for each AWS service used by this Quick Start. Prices are subject to change. |
-
Sign in to your AWS account, and choose one of the following options to launch the AWS CloudFormation template. For help with choosing an option, see deployment options earlier in this guide.
Deploy Container Registry with Amazon ECS into a new VPC on AWS |
|
Deploy Container Registry with Amazon ECS into an existing VPC on AWS |
| If you’re deploying Container Registry with Amazon ECS into an existing VPC, make sure that your VPC has two private subnets in different Availability Zones for the workload instances, and that the subnets aren’t shared. This Quick Start doesn’t support shared subnets. These subnets require NAT gateways in their route tables, to allow the instances to download packages and software without exposing them to the internet. |
Also, make sure that the domain name option in the DHCP options is configured as explained in the Amazon VPC documentation. You provide your VPC settings when you launch the Quick Start.
Each deployment takes about 45 minutes to complete.
-
Check the AWS Region that’s displayed in the upper-right corner of the navigation bar, and change it if necessary. This is where the network infrastructure for Container Registry with Amazon ECS will be built. The template is launched in the us-east-1 Region by default.
-
On the Create stack page, keep the default setting for the template URL, and then choose Next.
-
On the Specify stack details page, change the stack name if needed. Review the parameters for the template. Provide values for the parameters that require input. For all other parameters, review the default settings and customize them as necessary.
In the following tables, parameters are listed by category and described separately for the deployment options. When you finish reviewing and customizing the parameters, choose Next.
| Unless you are customizing the Quick Start templates for your own deployment projects, keep the default settings for the parameters Quick Start S3 bucket name, Quick Start S3 bucket Region, and Quick Start S3 key prefix. Changing these settings automatically updates code references to point to a new Quick Start location. For more information, see the AWS Quick Start Contributor’s Guide. |
Launch into a new VPC
| Parameter label (name) | Default value | Description |
|---|---|---|
SSH key name
( |
|
Name of an existing key pair, which allows you to securely connect to your instance after it launches. |
Permitted IP range
( |
|
CIDR IP range that is permitted to access Artifactory. It is recommend that you set this value to a trusted IP range. For example, you may want to limit software access to your corporate network. |
Remote access CIDR
( |
|
Remote CIDR range that allows you to connect to the bastion instance by using SSH. It is recommended that you set this value to a trusted IP range. For example, you may want to grant specific ranges from within your corporate network that use the SSH protocol. |
| Parameter label (name) | Default value | Description |
|---|---|---|
Availability Zones
( |
|
List of Availability Zones to use for the subnets in the VPC. Two Availability Zones are used for this deployment, and the logical order of your selections is preserved. |
VPC CIDR
( |
|
CIDR block for the VPC. |
Private subnet 1 CIDR
( |
|
CIDR block for private subnet 1 located in Availability Zone 1. |
Private subnet 2 CIDR
( |
|
CIDR block for private subnet 2 located in Availability Zone 2. |
Public subnet 1 CIDR
( |
|
CIDR block for the public (DMZ) subnet 1 located in Availability Zone 1. |
Public subnet 2 CIDR
( |
|
CIDR block for the public (DMZ) subnet 2 located in Availability Zone 2. |
| Parameter label (name) | Default value | Description |
|---|---|---|
Bastion instance
( |
|
To skip creating a bastion instance, choose Disabled. Because Artifactory nodes are created in private subnets, it’s highly recommended to set this value to Enabled. |
Bastion instance type
( |
|
Size of the bastion instances. |
Bastion operating system
( |
|
Linux distribution for the Amazon Machine Image (AMI) to be used for the bastion instances. |
Bastion root volume size
( |
|
Size of the root volume on the bastion instances. |
Bastion enable TCP forwarding
( |
|
Choose whether to enable TCPForwarding via the bootstrapping of the bastion instance or not. |
Number of bastion instances
( |
|
Number of bastion instances to create. |
Bastion enable X11 forwarding
( |
|
Choose true to enable X11 via the bootstrapping of the bastion host. Setting this value to true enables X Windows over SSH. X11 forwarding can be very useful, but it is also a security risk, so it’s recommended that you keep the default (false) setting. |
| Parameter label (name) | Default value | Description |
|---|---|---|
ECS cluster name
( |
|
The desired name for your ECS cluster. |
EC2 instance type
( |
|
EC2 instance type for the JFrog Container Registry Docker hosts. |
EBS Root volume size
( |
|
Size in gigabytes of the available storage; the Quick Start will create an Amazon Elastic Block Store (Amazon EBS) volumes of this size. |
| Parameter label (name) | Default value | Description |
|---|---|---|
JFrog Container Registry version
( |
|
Version of JFrog Container Registry that you want to deploy into the Quick Start. Please see the release notes to select the version you want to deploy. https://www.jfrog.com/confluence/display/RTF/Release+Notes |
Release stage of the product to deploy
( |
|
Whether to use the upstream repository that is pre-GA. |
Number of EC2 nodes
( |
|
Number of EC2 nodes to create for the ECS cluster. There must be enough nodes to run the number of secondaries plus the primary task. |
JFrog Container Registry certificate secret name
( |
|
Secret name created in AWS Secrets Manager which contains the SSL certificate and certificate key. |
JFrog Container Registry server name
( |
|
Name of your JFrog Container Registry server. Ensure that this matches your certificate. |
Master server key
( |
|
Master key for the JFrog Container Registry cluster. Generate a master key by using the command '$openssl rand -hex 16'. |
Extra Java options
( |
|
Set Java memory parameters for JFrog Container Registry. For more information, see the Artifactory system requirements. https://www.jfrog.com/confluence/display/RTF/System+Requirements#SystemRequirements-RecommendedHardware. |
Default Java memory settings
( |
|
Choose false to overwrite the standard calculations of memory options to pass to the JVM for JFrog Container Registry. If you plan to overwrite them, ensure they are added to the ExtraJavaOptions to avoid the stack failing to provision. |
Ansible Vault password
( |
|
Ansible Vault password to protect the JFrog Container Registry YAML configuration file generated during the JFrog Container Registry deployment. This YAML file is stored on the EC2 nodes and secured with this password. |
| Parameter label (name) | Default value | Description |
|---|---|---|
Database name
( |
|
Name of your database instance. The name must be unique across all database instances owned by your AWS account in the current AWS Region. The database instance identifier is case-insensitive, but it’s stored in lowercase (as in "mydbinstance"). |
Database negine
( |
|
Database engine that you want to run, currently locked to Postgres. |
Database user
( |
|
Login ID for the master user of your Database instance. |
Database password
( |
|
Password for the JFrog Container Registry database user. |
Database instance type
( |
|
Size of the database to be deployed as part of the Quick Start. |
Database allocated storage
( |
|
Size in gigabytes of the available storage for the database instance. |
High available database
( |
|
Choose false to create an Amazon RDS instance in a single Availability Zone. |
| Parameter label (name) | Default value | Description |
|---|---|---|
Quick Start S3 bucket name
( |
|
S3 bucket name for the Quick Start assets. This string can include numbers, lowercase letters, and hyphens (-). It cannot start or end with a hyphen (-). |
Quick Start S3 key prefix
( |
|
S3 key prefix for the Quick Start assets. Quick Start key prefix can include numbers, lowercase letters, uppercase letters, hyphens (-), and forward slash (/). |
Quick Start S3 bucket region
( |
|
AWS Region where the Quick Start S3 bucket (QSS3BucketName) is hosted. When using your own bucket, you must specify this value. |
Launch into an existing VPC
| Parameter label (name) | Default value | Description |
|---|---|---|
SSH key name
( |
|
Name of an existing key pair, which allows you to securely connect to your instance after it launches. |
Permitted IP range
( |
|
CIDR IP range that is permitted to access Artifactory. We recommend that you set this value to a trusted IP range. For example, you might want to grant only your corporate network access to the software. |
Remote access CIDR
( |
|
Remote CIDR range that allows you to connect to the bastion instance by using SSH. We recommend that you set this value to a trusted IP range. For example, you might want to grant specific ranges inside your corporate network SSH access. |
| Parameter label (name) | Default value | Description |
|---|---|---|
VPC ID
( |
|
ID of your existing VPC (e.g., vpc-0343606e). |
Vpc CIDR
( |
|
CIDR block for the VPC. |
Public subnet 1 ID
( |
|
ID of the public subnet in Availability Zone 1 in your existing VPC (e.g., subnet-z0376dab). |
Public subnet 2 ID
( |
|
ID of the public subnet in Availability Zone 2 in your existing VPC (e.g., subnet-a29c3d84). |
Private subnet 1 ID
( |
|
ID of the private subnet in Availability Zone 1 in your existing VPC (e.g., subnet-a0246dcd). |
Private subnet 2 ID
( |
|
ID of the private subnet in Availability Zone 2 in your existing VPC (e.g., subnet-b58c3d67). |
Private subnet 1 CIDR
( |
|
CIDR of the private subnet in Availability Zone 1 in your existing VPC (e.g., 10.0.0.0/19). |
Private subnet 2 CIDR
( |
|
Cidr of the private subnet in Availability Zone 2 in your existing VPC (e.g., 10.0.32.0/19). |
Elastic Load Balancer scheme
( |
|
Choose whether this will be internet facing or internal. |
| Parameter label (name) | Default value | Description |
|---|---|---|
Bastion instance
( |
|
Choose Disabled to skip creating a bastion instance. Due to the JFrog Container Registry nodes being created in private subnets, the default setting of Enabled this is highly recommended. |
Bastion instance type
( |
|
Size of the bastion instances. |
Bastion operating system
( |
|
Linux distribution for the Amazon Machine Image (AMI) to be used for the bastion instances. |
Bastion root volume size
( |
|
Size of the root volume on the bastion instances. |
Bastion enable TCP forwarding
( |
|
Choose whether to enable TCPForwarding via the bootstrapping of the bastion instance or not. |
Number of bastion instances
( |
|
Number of bastion instances to create. |
Bastion enable X11 forwarding
( |
|
Choose true to enable X11 via the bootstrapping of the bastion host. Setting this value to true will enable X Windows over SSH. X11 forwarding can be very useful but it is also a security risk, so we recommend that you keep the default (false) setting unless required. |
| Parameter label (name) | Default value | Description |
|---|---|---|
ECS cluster name
( |
|
Name for your ECS cluster. |
Create new ECS cluster
( |
|
Choose whether to create a new ECS cluster with the name specified in the 'ClusterName' parameter. If you choose Disabled, an ECS cluster with the name specified in the 'CluserName' parameter must already exist. |
Create new ECS Role
( |
|
Choose Whether to create a new ECS role or not. If you choose Disabled, the role must exist, and have the proper permissions for the ECS tasks |
ECS Role Name
( |
|
Role Name for customized role if you choose Disabled for CreateNewEcsRole. |
ECS Role Arn
( |
|
Role Arn for customized role if you choose Disabled for CreateNewEcsRole. |
EC2 instance type
( |
|
The EC2 instance type for the JFrog Container Registry Docker hosts. |
EBS Root volume size
( |
|
Size in gigabytes of available storage. The Quick Start creates an Amazon Elastic Block Store (Amazon EBS) volumes of this size. |
| Parameter label (name) | Default value | Description |
|---|---|---|
JFrog Container Registry version
( |
|
Version of JFrog Container Registry that you want to deploy into the Quick Start. Please see the release notes to select the version you want to deploy. https://www.jfrog.com/confluence/display/RTF/Release+Notes |
Release stage of the product to deploy
( |
|
Whether to use the upstream repository that is pre-GA. |
Number of EC2 nodes
( |
|
Number of EC2 nodes to create for the ECS cluster. There must be enough nodes to run the number of secondaries plus the primary task. |
JFrog Container Registry certificate secret name
( |
|
Secret name created in AWS Secrets Manager which contains the SSL certificate, certificate key. |
JFrog Container Registry server name
( |
|
Name of your JFrog Container Registry server. Ensure that this matches your certificate. |
Master server key
( |
|
Master key for the JFrog Container Registry cluster. Generate a master key by using the command '$openssl rand -hex 16'. |
Extra Java options
( |
|
Setting Java memory parameters for JFrog Container Registry. For more information, see the Artifactory system requirements. https://www.jfrog.com/confluence/display/RTF/System+Requirements#SystemRequirements-RecommendedHardware. |
Default Java memory settings
( |
|
Choose false to overwrite the standard calculations of memory options to pass to the JVM for JFrog Container Registry. If overwriting them, ensure they are added to the ExtraJavaOptions to avoid the stack failing to provision. |
Ansible Vault password
( |
|
Ansible Vault password to protect the JFrog Container Registry YAML configuration file generated during the JFrog Container Registry deployment. This YAML file is stored on the EC2 nodes and secured with this password. |
| Parameter label (name) | Default value | Description |
|---|---|---|
Database name
( |
|
Name for your database instance. The name must be unique across all database instances owned by your AWS account in the current AWS Region. The database instance identifier is case-insensitive, but it’s stored in lowercase (as in "mydbinstance"). |
Database negine
( |
|
Database engine that you want to run, currently locked to Postgres. |
Database user
( |
|
Login ID for the master user of your Database instance. |
Database password
( |
|
Password for the JFrog Container Registry database user. |
Database instance type
( |
|
Size of the database to be deployed as part of the Quick Start. |
Database allocated storage
( |
|
Size in gigabytes of the available storage for the database instance. |
High available database
( |
|
Choose false to create an Amazon RDS instance in a single Availability Zone. |
| Parameter label (name) | Default value | Description |
|---|---|---|
Quick Start S3 bucket name
( |
|
S3 bucket name for the Quick Start assets. This string can include numbers, lowercase letters, and hyphens (-). It cannot start or end with a hyphen (-). |
Quick Start S3 key prefix
( |
|
S3 key prefix for the Quick Start assets. Quick Start key prefix can include numbers, lowercase letters, uppercase letters, hyphens (-), and forward slash (/). |
Quick Start S3 bucket region
( |
|
AWS Region where the Quick Start S3 bucket (QSS3BucketName) is hosted. When using your own bucket, you must specify this value. |
-
On the Configure stack options page, you can specify tags (key-value pairs) for resources in your stack and set advanced options. When you’re finished, choose Next.
-
On the Review page, review and confirm the template settings. Under Capabilities, select the two check boxes to acknowledge that the template creates IAM resources and might require the ability to automatically expand macros.
-
Choose Create stack to deploy the stack.
-
Monitor the status of the stack. When the status is CREATE_COMPLETE, the Container Registry deployment is ready.
-
Use the values displayed in the Outputs tab for the stack, as shown in Figure 3, to view the created resources.

Get started with JFrog Container Registry
-
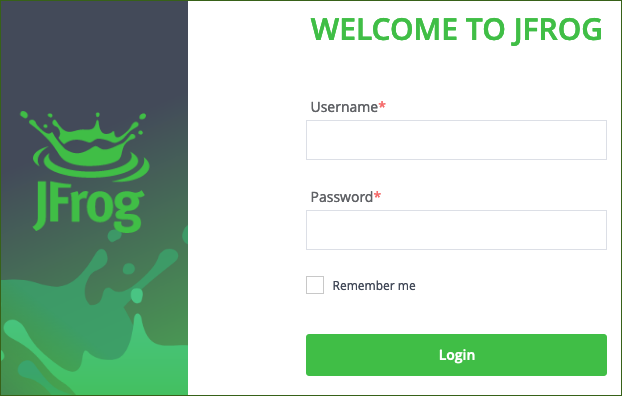
Connect to Container Registry from
JFrogContainerRegistryUrl. You can findJFrogContainerRegistryUrlon the Outputs tab of the Container Registry primary stack. Verify that you can view the login screen.
| If you use a non-CA-signed certificate, you will receive a certificate warning when you attempt to access the page. This happens because the certificate doesn’t match the ELB DNS unless you configure Amazon Route 53. |
-
The default user name and password for Container Registry are
adminandpassword, respectively. Enter your credentials, and choose Login. For more information, see JFrog Users and Groups.
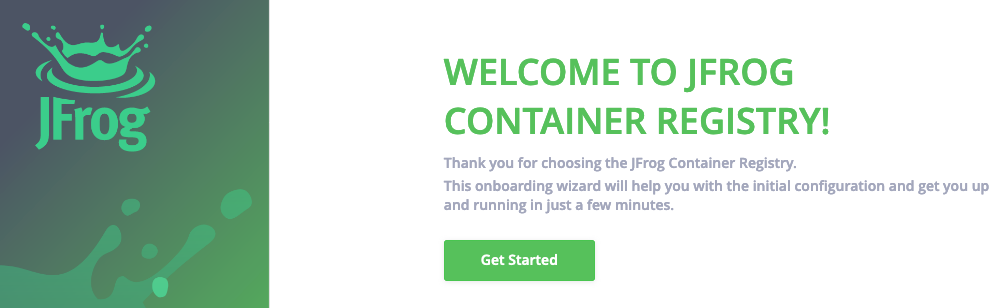
This loads the setup wizard for initial configuration. Choose Get Started. (See Figure 5.)
This Quick Start handles the license key configuration during the deployment, so you are not prompted to activate your license.
-
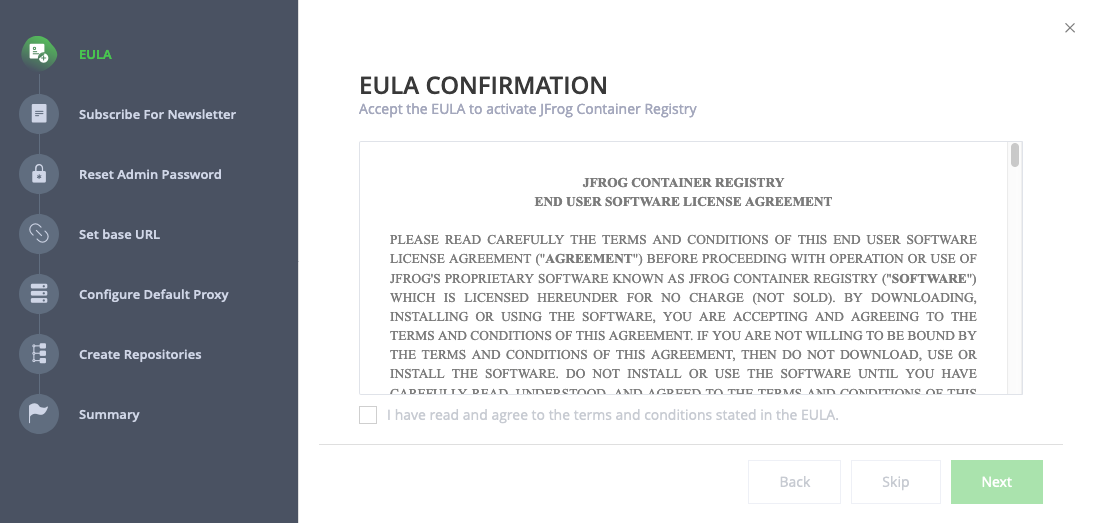
Read and accept the End User License Agreement (EULA), and then choose Next. (See Figure 6.)
-
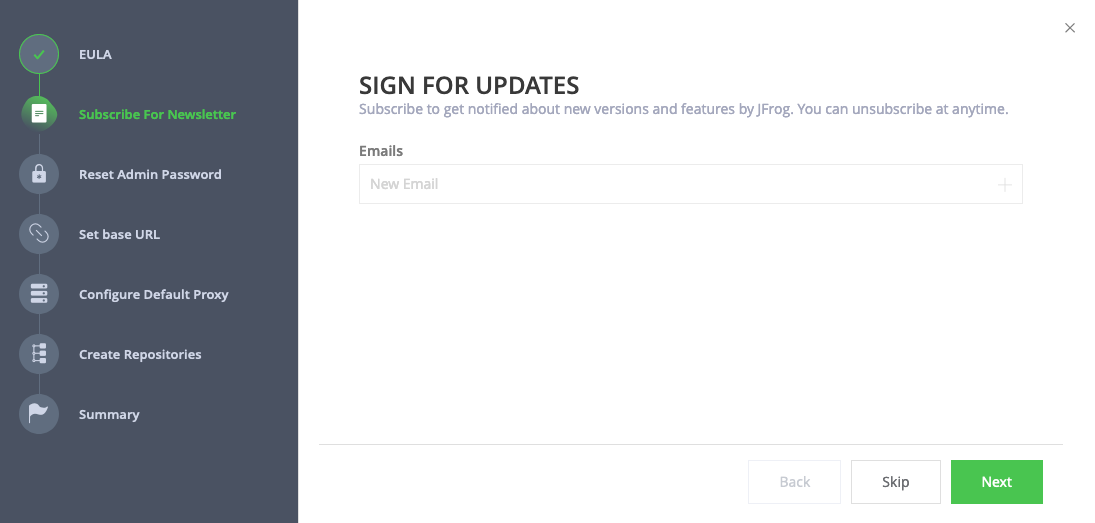
Optionally, sign up for notifications from JFrog. (See Figure 7.)
-
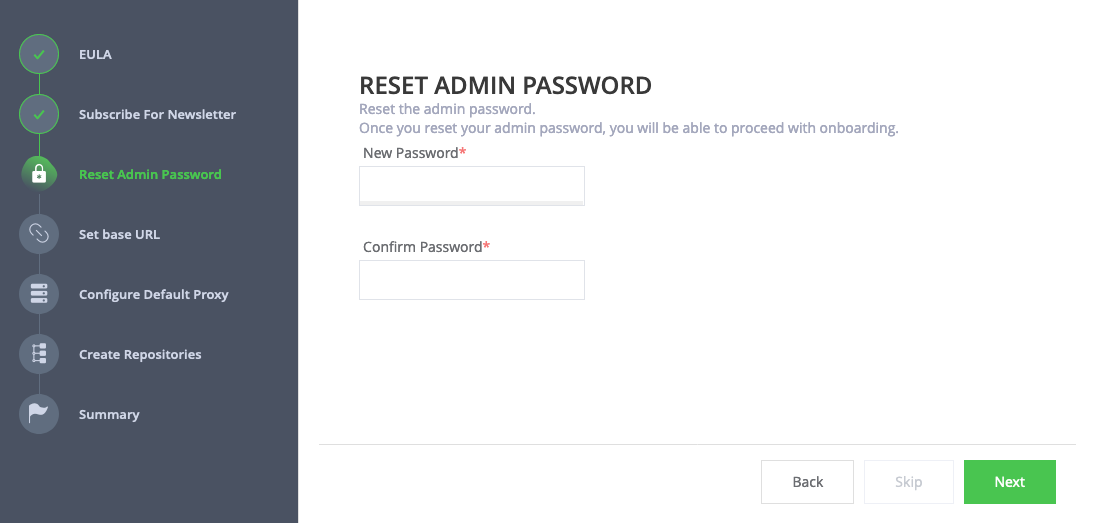
Set a secure administrator password for your deployment, and then choose Next. (See Figure 8.)
-
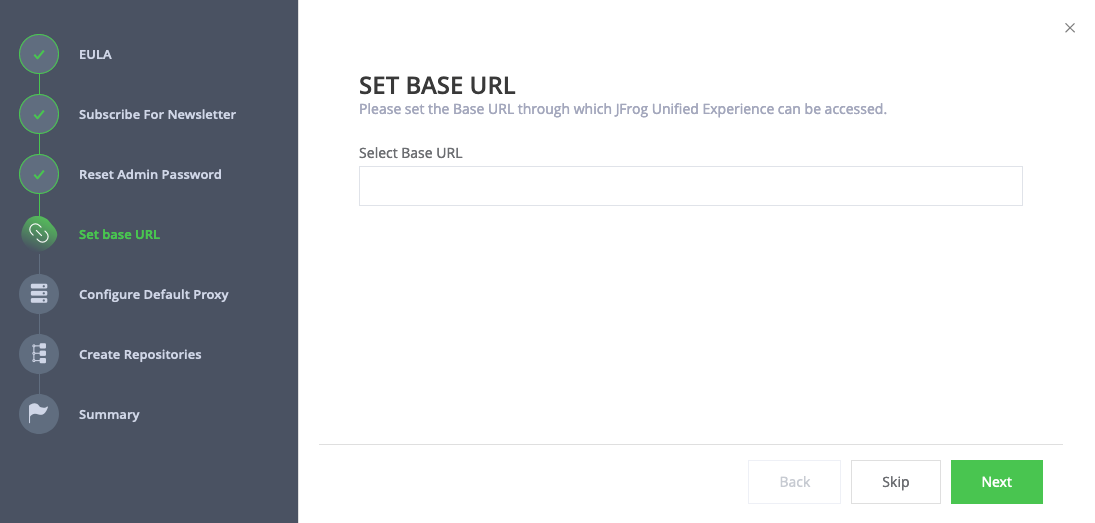
Optionally, configure the base URL setting. Because this deployment uses a proxy, it’s highly recommended that you update the base URL of Container Registry. Read more about JFrog Platform settings. (See Figure 9.)
-
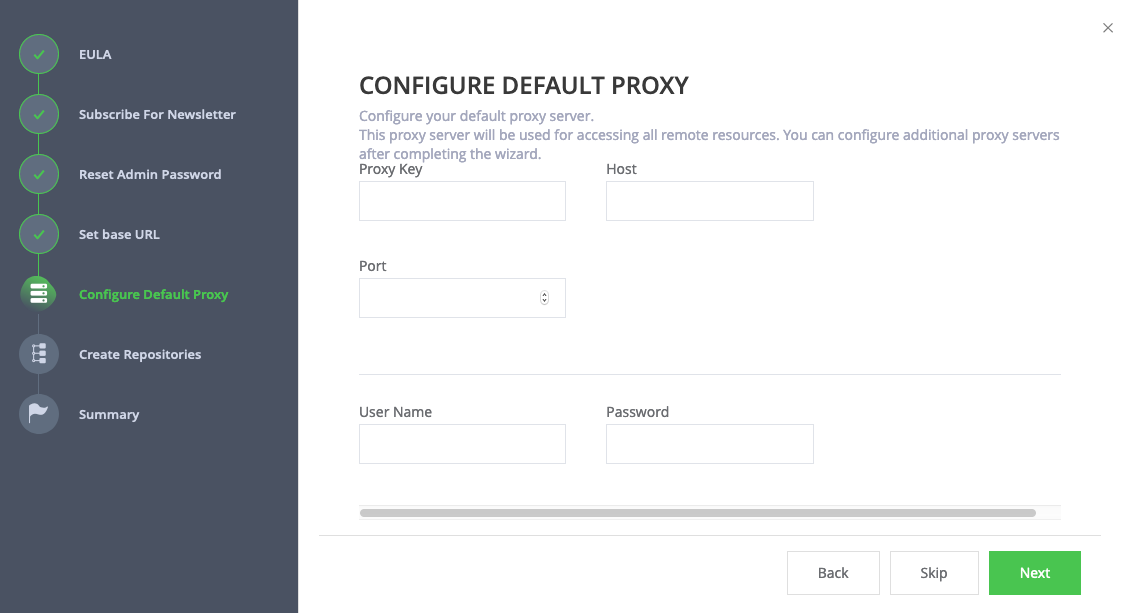
Optionally, configure proxy settings for remote resources. (See Figure 10.)
-
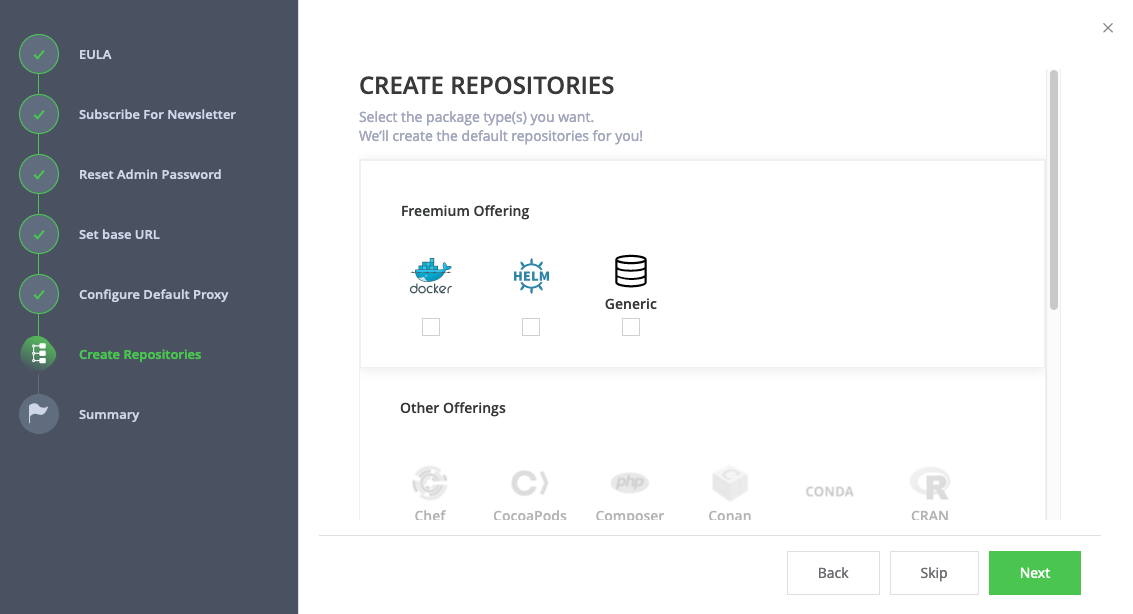
Select the repositories that you require, and then choose Create. (See Figure 11.)
-
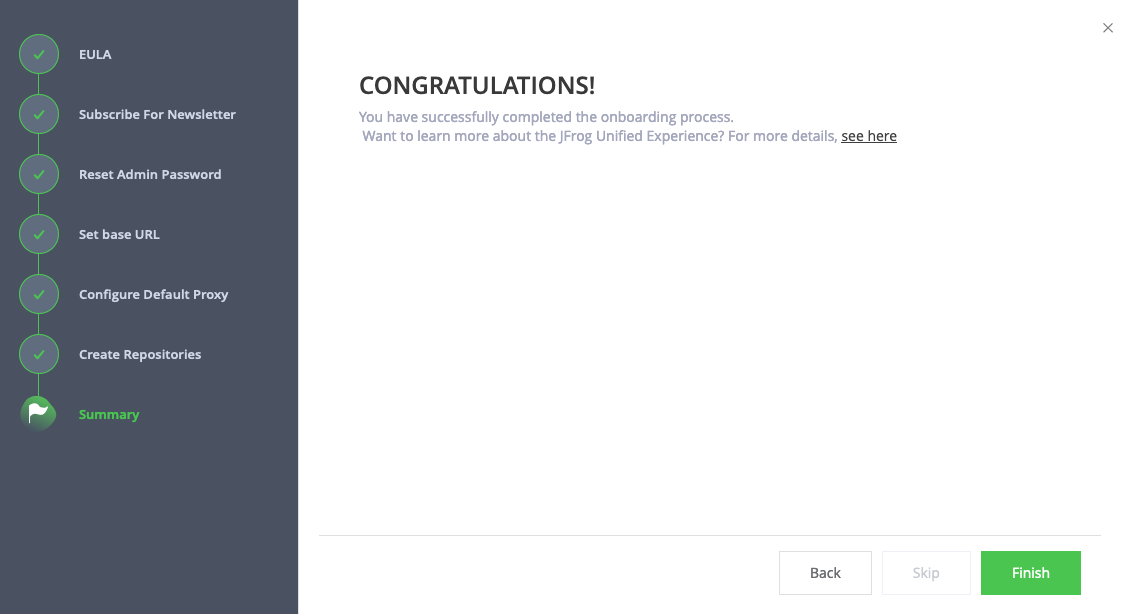
Choose Finish. (See Figure 12.)
-
Complete the administrative tasks by configuring the following:
| Backups save to the local file system and do not persist if the EC2 instance is terminated. It is recommended to create snapshots of the primary instance. |
Updating Container Registry
If maintenance must be performed on the stack, ensure that you update the CloudFormation stack rather than updating the infrastructure manually (this also applies to updating Container Registry). The Container Registry version for this Quick Start is 7.0.x.
| Because the instances are backed by an AWS Marketplace AMI, the version you update must be available in AWS Marketplace, and a new map must be created in the CloudFormation templates. Otherwise, the update will fail. |
-
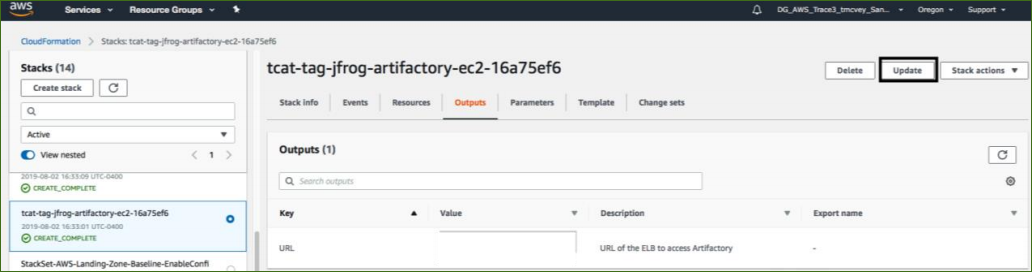
Choose the root stack, and then choose Update. (See Figure 13.)
-
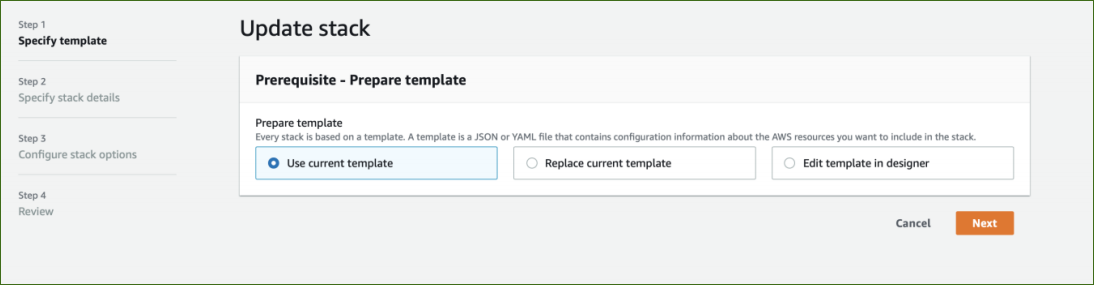
On the Prerequisite screen, Choose Use current template, and then choose Next. (See Figure 14.)
-
Find the Container Registry version field by scrolling down. (See Figure 15.)

-
Enter the version number that you want to run. (See Figure 16.)

-
Scroll down, and choose Next. Choose Next again, unless you want to change any other tags or policies. Select the two I acknowledge check boxes, and choose Update stack. (See Figure 17.)
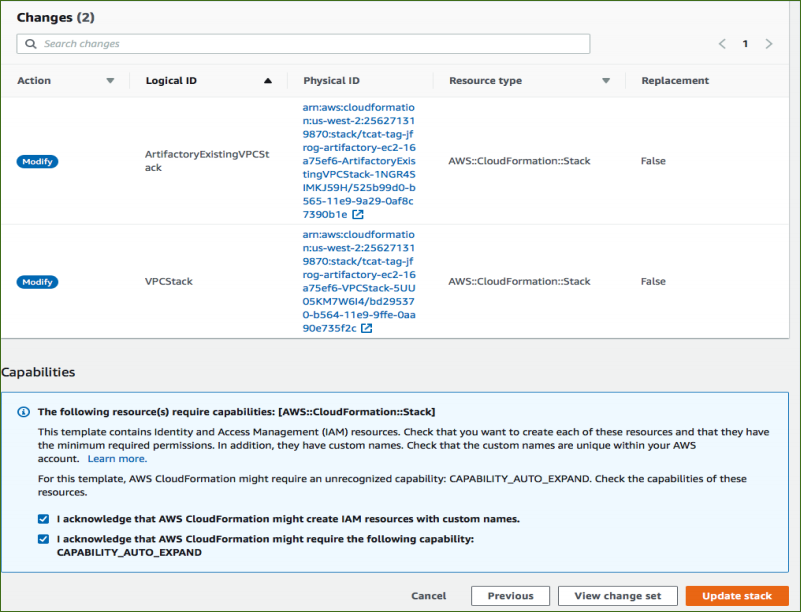
-
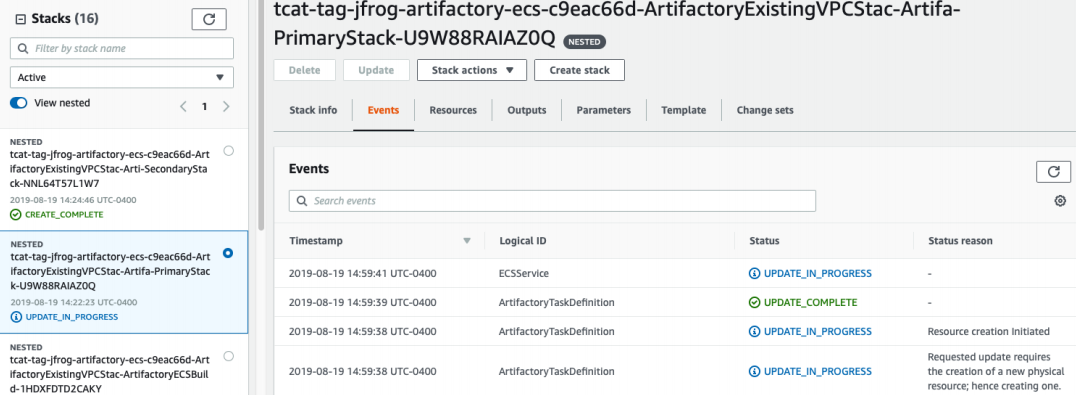
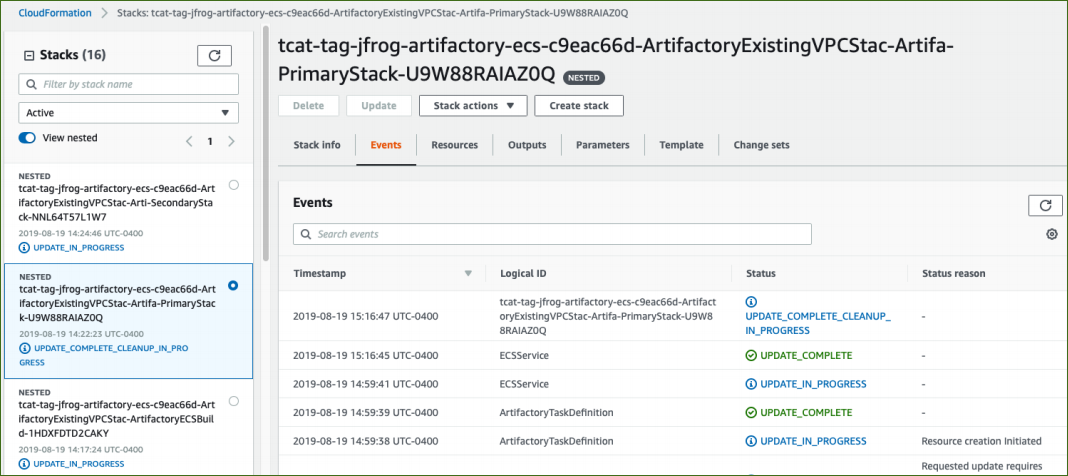
Select the stack called ArtifactoryExistingVPCStac-Artifa-PrimaryStack.
During the update process, JCRTaskDefnition is updated based on the event’s timestamp, but ECSService is stuck on UPDATE_IN_PROGRESS. This must be updated manually, and, if it’s done incorrectly, it can cause environment downtime. (See Figure 18.)
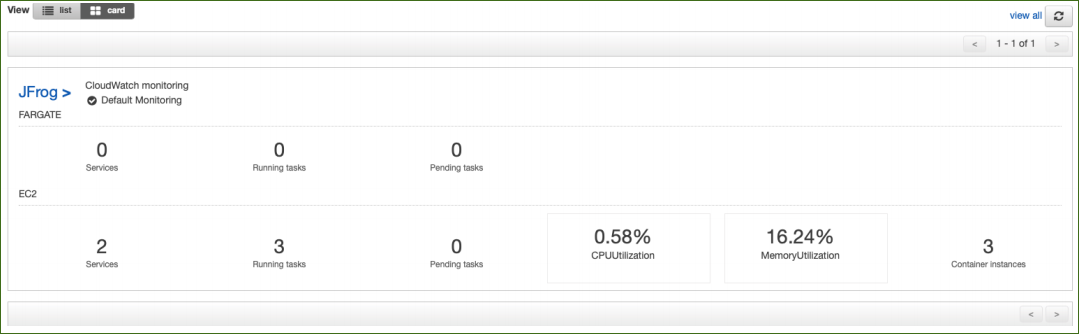
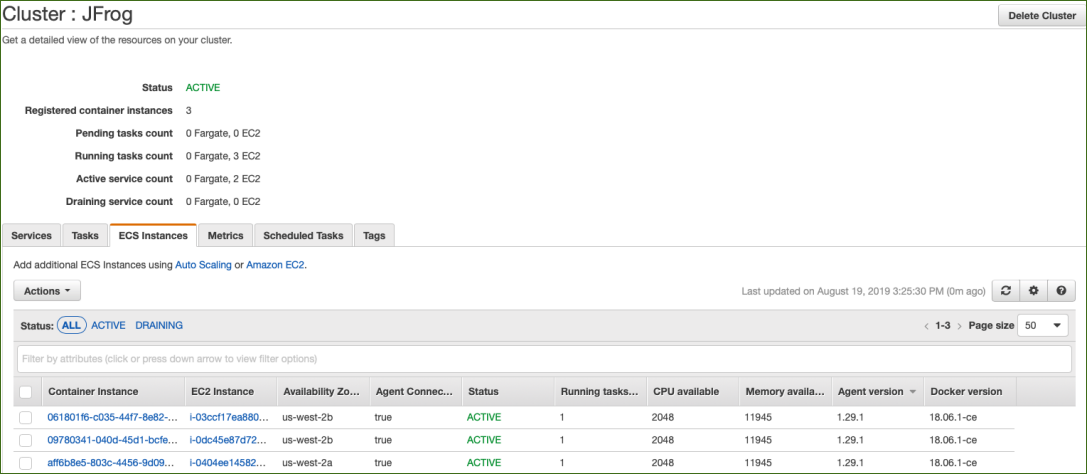
-
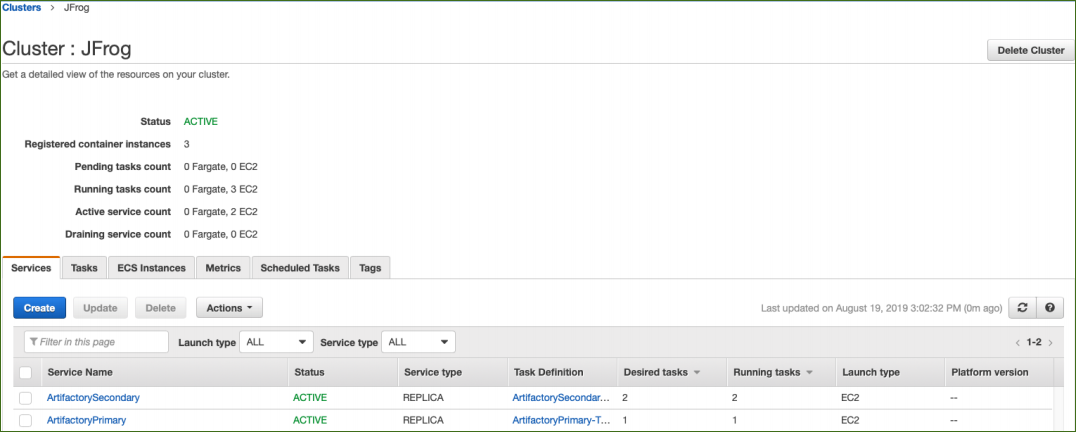
In the Amazon ECS console, select the ECS cluster. If you used the default option, the cluster name is JFrog. (See Figure 19.)
-
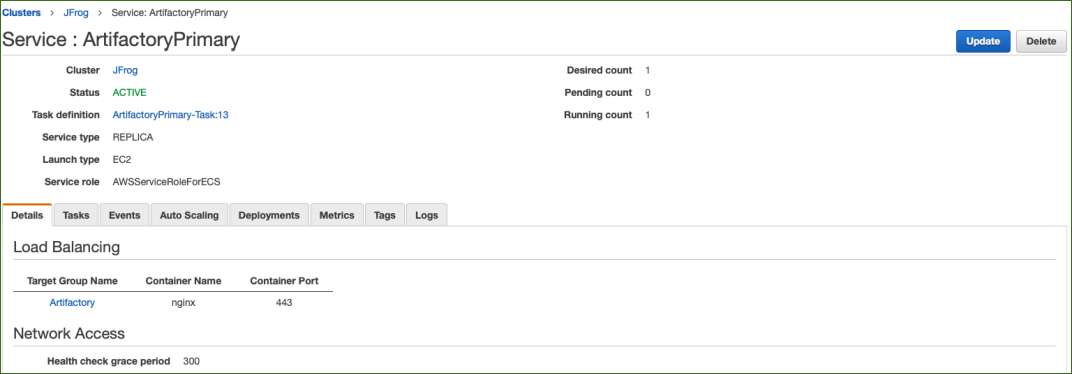
Select the
JFrog-Container-Registryservice. (See Figure 20.)
-
Choose the current Task definition. The task definition is
JFrog-Container-Registry-Task:4. (See Figure 21.)
-
Scroll down and expand the Container definitions to ensure that the version is updated. (See Figure 22.)

-
After you verify that the task has been updated, find the primary task. Navigate back to the ECS console cluster screen (Figure 19), and select the JFrog-Container-Registry service. Then choose the Tasks tab.
-
Select the
JFrog-Container-RegistryTask that is currently running. This will open the task. Choose Stop. -
On the Container Instance page, look for the ArtifactoryPrimary task definition. (See Figure 24.)
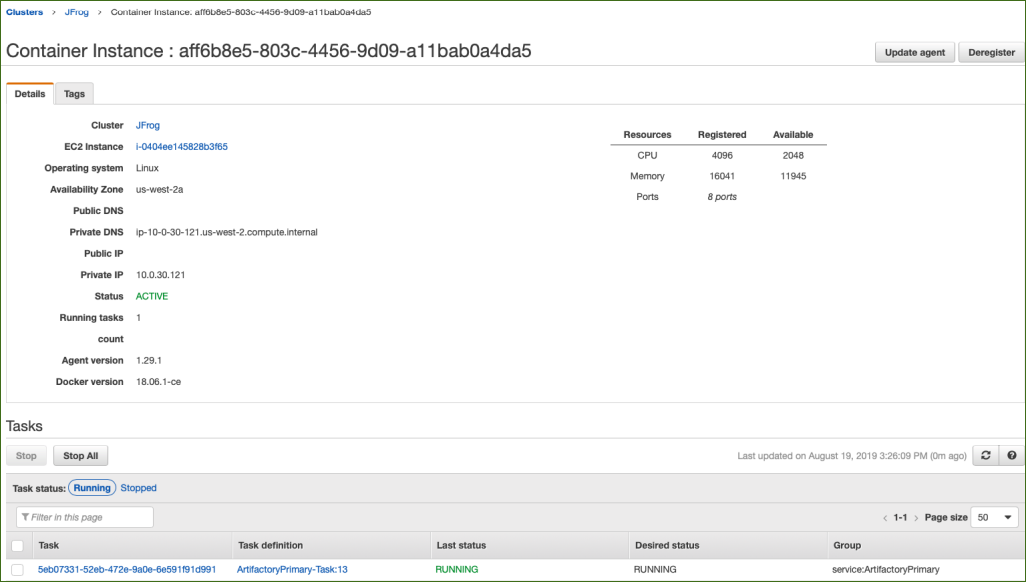
In this example, the EC2 instance is i-0404ee145828b3f65.
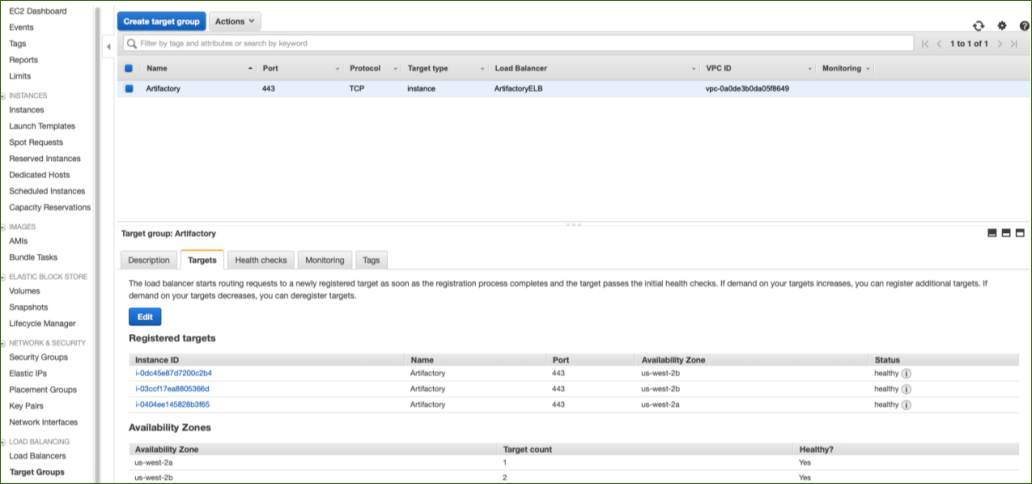
-
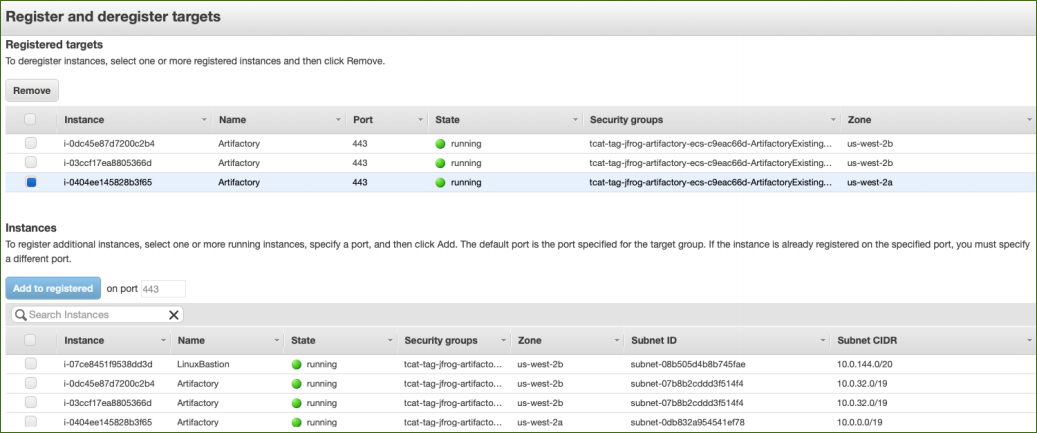
On the Amazon EC2 console, choose Target Groups, and then select the Artifactory target group.
-
Choose Edit. (See Figure 25.)
-
Select the instance that’s running the primary container, and choose Remove. This ensures that no outage is experienced while the new primary node is created. (See Figure 26.)
-
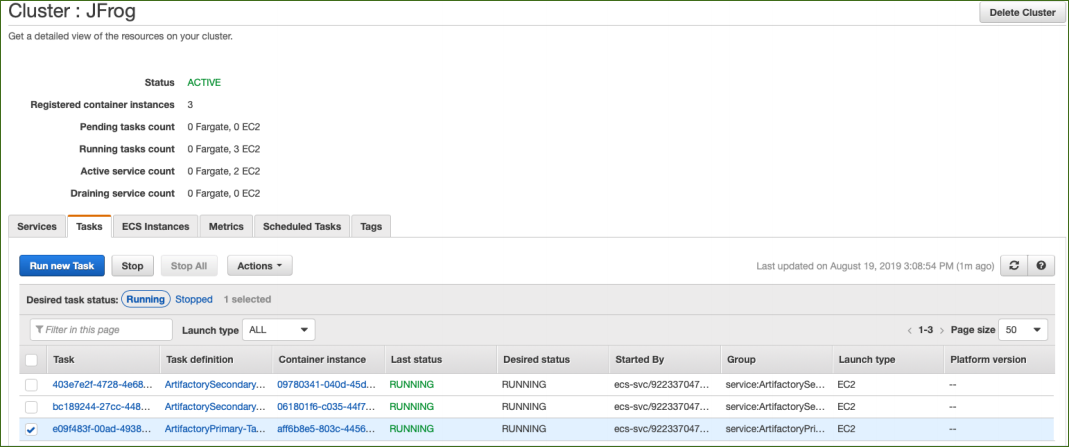
Stop ArtifactoryPrimary-Task. Return to the Amazon ECS console and select the cluster. On the Tasks tab, select ArtifactoryPrimary-Task, and choose Stop. (See Figure 27.)
-
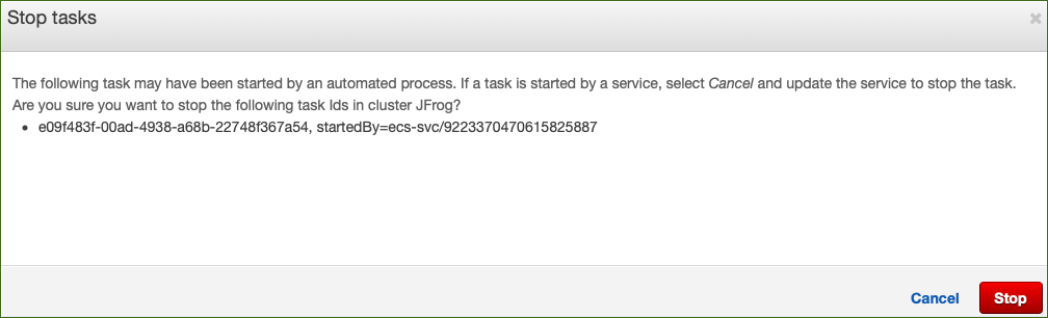
In the pop-up window, choose Stop. (See Figure 28.) This stops the primary container.
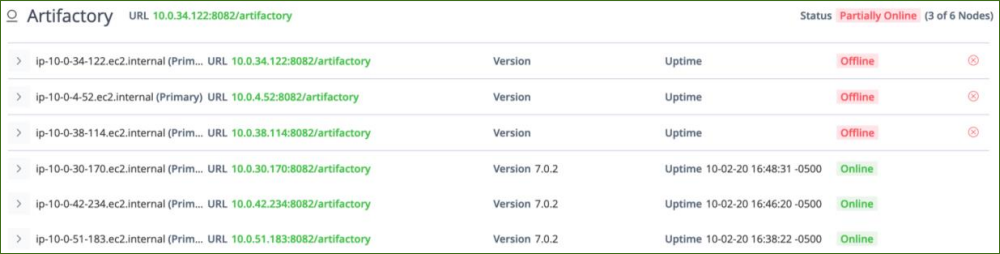
After a few minutes, the service recognizes the stopped task and kicks off the latest version of the task definition. (See Figure 29.)

The proper version is updated on the JFrog Artifactory High Availability Configuration page. (See Figure 30.)
The CloudFormation console shows the progress of the update. (See Figure 31.)
-
Repeat steps 1–10 for the ArtifactorySecondary service. Do one task at a time.
| To avoid downtime, be sure to remove the instances from the Registered Targets list (step 15 of this procedure). |
Security
By default, the load balancer does not match your certificate. You must configure the DNS according to your organization’s configuration, which is highly recommended for a production deployment. When you create a new VPC, the private subnet CIDR is automatically provided to the database security group ArtifactoryBDSG. In the new VPC, the private subnet is accessible only from the public subnet. When you deploy to an existing VPC, ensure similar rules are followed so that your Artifactory nodes are not accessible directly from the internet. Also, ensure that the private CIDR is correct and locked down. Avoid using 0.0.0.0/0. If the subnet is a public subnet, it will allow your MySQL database to be available from the internet.
Storage
A major difference between running on-premises and on AWS is storage. Because S3 is used, you are charged for what is currently in use rather than what may be allocated on premises. Ensure to monitor your usage.
FAQ
Q. I provisioned more secondary nodes than I have licenses, and I cannot access Artifactory. What do I do?
A. In the AWS CloudFormation console, choose Update stack, and reduce the number of secondary nodes to the number of licenses you purchased, minus one license for the master.
Q. My license ran out and Artifactory is unresponsive. How do I fix this?
A. Reduce the number of secondary nodes to zero, and contact JFrog for a new license.
Q. My certificate is out of date. How do I update it?
A. The certificate is handled via Ansible or Helm. In the AWS CloudFormation console, choose Update stack, change the certificate and certificate key values. Then, by rolling restart, update the master node first, and then, one at a time, the secondary nodes. This will rebuild each node with the correct certificate.
Q. I encountered a CREATE_FAILED error when I launched the Quick Start.
A. If AWS CloudFormation fails to create the stack, we recommend that you relaunch the template with Rollback on failure set to No. (This setting is under Advanced in the AWS CloudFormation console, Options page.) With this setting, the stack’s state is retained and the instance is left running, so you can troubleshoot the issue. (For Windows, look at the log files in %ProgramFiles%\Amazon\EC2ConfigService and C:\cfn\log.)
| When you set Rollback on failure to Disabled, you continue to incur AWS charges for this stack. Please make sure to delete the stack when you finish troubleshooting. |
For additional information, see Troubleshooting AWS CloudFormation on the AWS website.
Q. I encountered a size limitation error when I deployed the AWS CloudFormation templates.
A. We recommend that you launch the Quick Start templates from the links in this guide or from another S3 bucket. If you deploy the templates from a local copy on your computer or from a location other than an S3 bucket, you might encounter template size limitations. For more information about AWS CloudFormation quotas, see AWS CloudFormation quotas.
Send us feedback
To post feedback, submit feature ideas, or report bugs, use the Issues section of the GitHub repository for this Quick Start. To submit code, see the Quick Start Contributor’s Guide.
Quick Start reference deployments
See the AWS Quick Start home page.
GitHub repository
Visit our GitHub repository to download the templates and scripts for this Quick Start, to post your comments, and to share your customizations with others.
Notices
This document is provided for informational purposes only. It represents AWS’s current product offerings and practices as of the date of issue of this document, which are subject to change without notice. Customers are responsible for making their own independent assessment of the information in this document and any use of AWS’s products or services, each of which is provided “as is” without warranty of any kind, whether expressed or implied. This document does not create any warranties, representations, contractual commitments, conditions, or assurances from AWS, its affiliates, suppliers, or licensors. The responsibilities and liabilities of AWS to its customers are controlled by AWS agreements, and this document is not part of, nor does it modify, any agreement between AWS and its customers.
The software included with this paper is licensed under the Apache License, version 2.0 (the "License"). You may not use this file except in compliance with the License. A copy of the License is located at http://aws.amazon.com/apache2.0/ or in the accompanying "license" file. This code is distributed on an "AS IS" BASIS, WITHOUT WARRANTIES OR CONDITIONS OF ANY KIND, either expressed or implied. See the License for specific language governing permissions and limitations.